Paleo Banana Pudding…Pie

DSC_9667

After my last post defaming pecan pie, I am a little reluctant to give my opinion on another popular american dessert for fear of alienating any other fervent readers of Southern Hospitality.  I had no idea there would be so many pecan pie advocates who would be displeased with my assessment of that particular culinary atrocity but perhaps there is a lesson to be learned here?

Although I am not a fan of pecan pie, I absolutely adore banana pudding. This simple dessert was always a favorite of mine growing up. My grandmother would whip up some homemade vanilla pudding and layer it between slices of bananas and that ever-popular cookie from the late-sixties, Nilla wafers. This sweet and affordable dessert was perfect on a hot summer day and was easy enough to make for us even in the middle of the week. My grandmother would only enjoy her banana pudding on the first day, while the cookies were still crisp but I preferred my pudding day two, once they had become saturated and softened by the vanilla pudding.

In my own home, I have tried to eat as “cleanly” as possible for quite some time. It’s taken years but we have all but eliminated processed and prepared foods from our pantry and refrigerator. Consequently, we don’t keep boxes of Nilla wafers in our home as my grandmother always did, so my consumption of banana pudding has waned pretty drastically over the years. As I’ve mentioned previously, my attempts at creating “healthy” versions of some of my favorite foods has backfired on me more than once so I haven’t had the urge to make a batch of what would likely be hemp, spelt “faux-Nilla” wavers. Fortunately, I similarly adore banana cream pie, so opt for that when a craving arises. Even still, there’s the matter of sugar and white flour in pie that we’re all trying to eat less of these days. Womp womp.

Never fear my fellow banana pudding dessert lovers, there is an absolutely fantastic and healthful banana pudding pie recipe that will satiate those cravings! Upon the recommendation of a friend, I borrowed Paleo Comfort Foods from my local library. This book, written by Julie and Charles Mayfield, is full of fantastic and delicious homestyle cooking. I’ve made several recipes from this book and all have been delicious!

I combined two recipes from Paleo Comfort Foods to form one delicious and satisfying dessert that is gluten-free, sugar-free and dairy free (if you so choose). My personal feeling on Paleo-style desserts is that they are often heavy on coconut products like coconut flour, oil, milk and butter and have a tendency to have an over-powering coconut flavor, which is off-putting for some. Although this pie does call for coconut products, I am happy to report that it is certifiably bananatastic with not a lick of coconut undertones. Here are the recipes I followed:

NUTTY PIE CRUST

1 cup almond flour

1/2 cup pecans, roughly chopped

pinch of sea salt

1/4 cup coconut oil (melted) or butter (softened)

2 tablespoons honey (optional)

1 teaspoon vanilla extract

JULES’ BANANA PUDDING

1 can coconut milk

2 large egg yolks

1 teaspoon vanilla extract

1 tablespoon coconut oil

1 tablespoon coconut butter

3 REALLY ripe bananas

1/2 teaspoon cinnamon

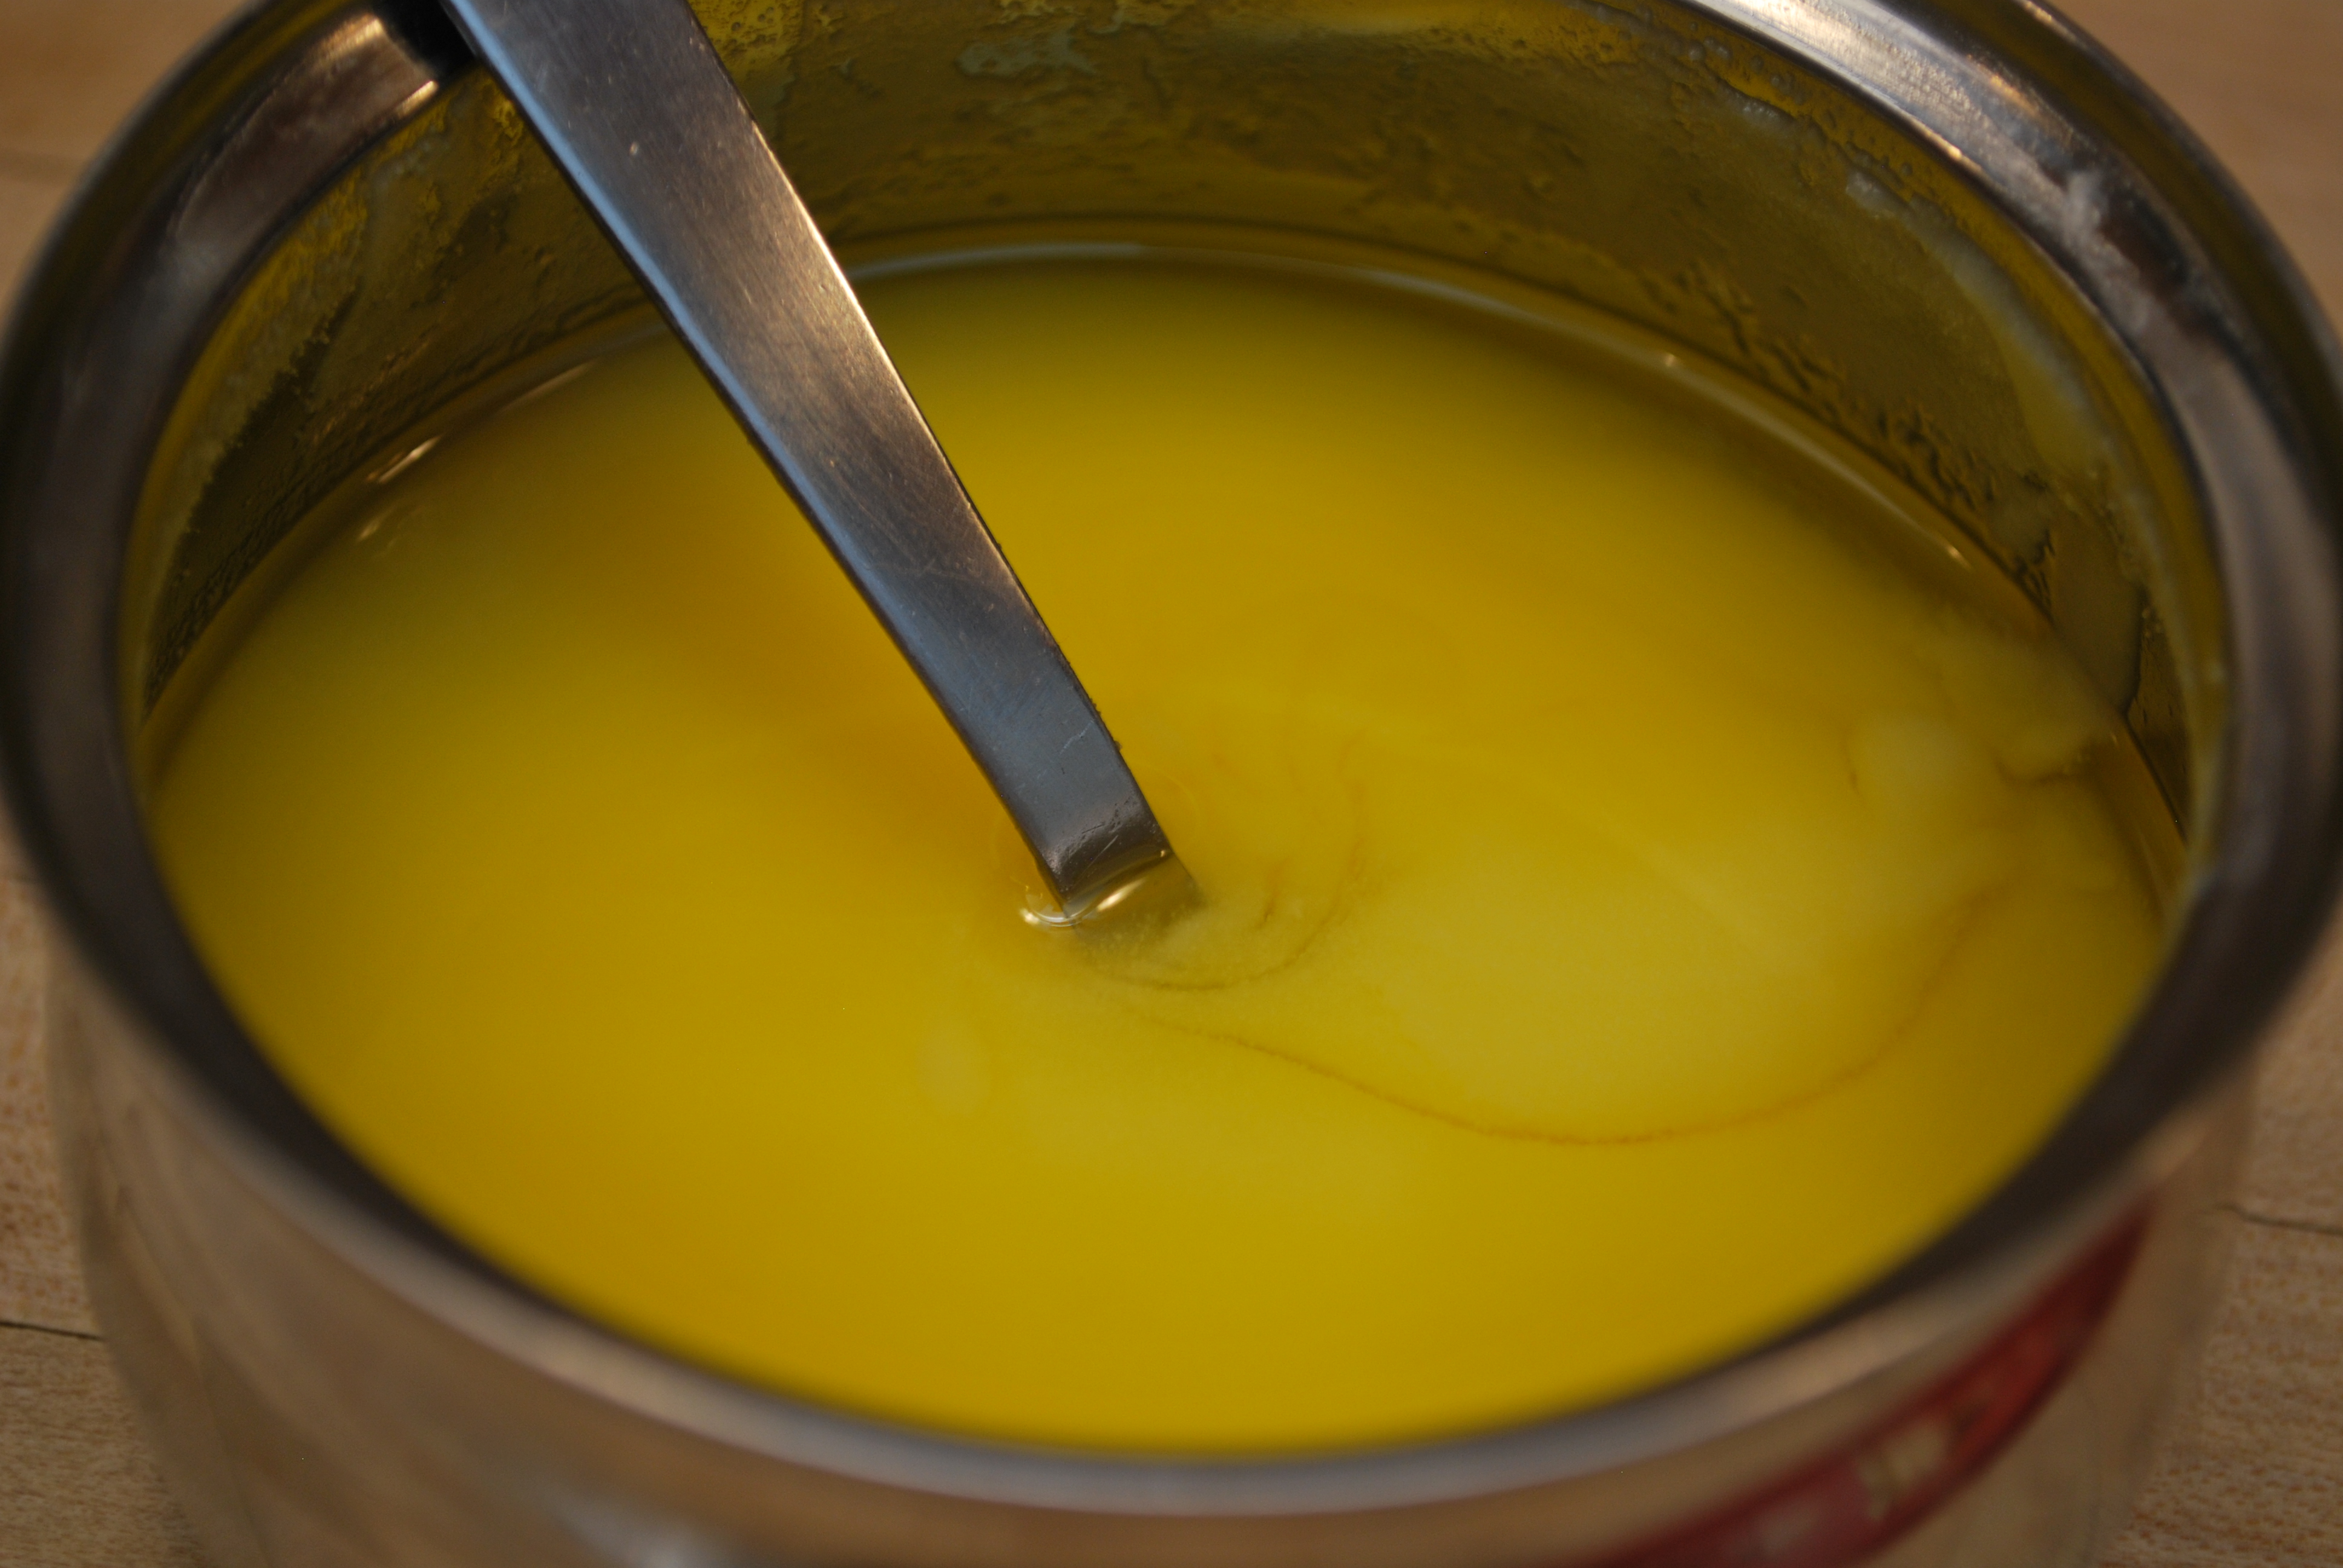
A note on coconut oil. If you aren’t a fan of coconut flavor, or even if you are and you are just looking for a neutral oil to cook with, I would suggest buying a jar of organic “Ultra Clean Supreme Expeller Pressed” coconut oil from Wilderness Family Naturals. This oil is expeller pressed mechanically without using solvents (as many oil processors use) and the coconut flavor is neutralized using a hot water/steam method. There is absolutely no coconut flavor but the integrity of this oil is still intact. It’s perfect for baking (in lieu of shortening) and great for frying, sauteing or eating by the spoonful, if that’s what you’re in to.

The first thing you need to do is make your crust. FYI, this crust is delicious and would be the perfect base for many other pies, particularly the fruit variety. The pecans add a slight sweetness, which is nice for this dessert, but you can use just about any kind of nut you’d like in this pastry.

Preheat your oven to 350 degrees and roughly chop 1/2 cup of pecans. You can either do this in a food processor by pulsing the blade a few times or just use a good old-fashioned knife and cutting board.

DSC_9578

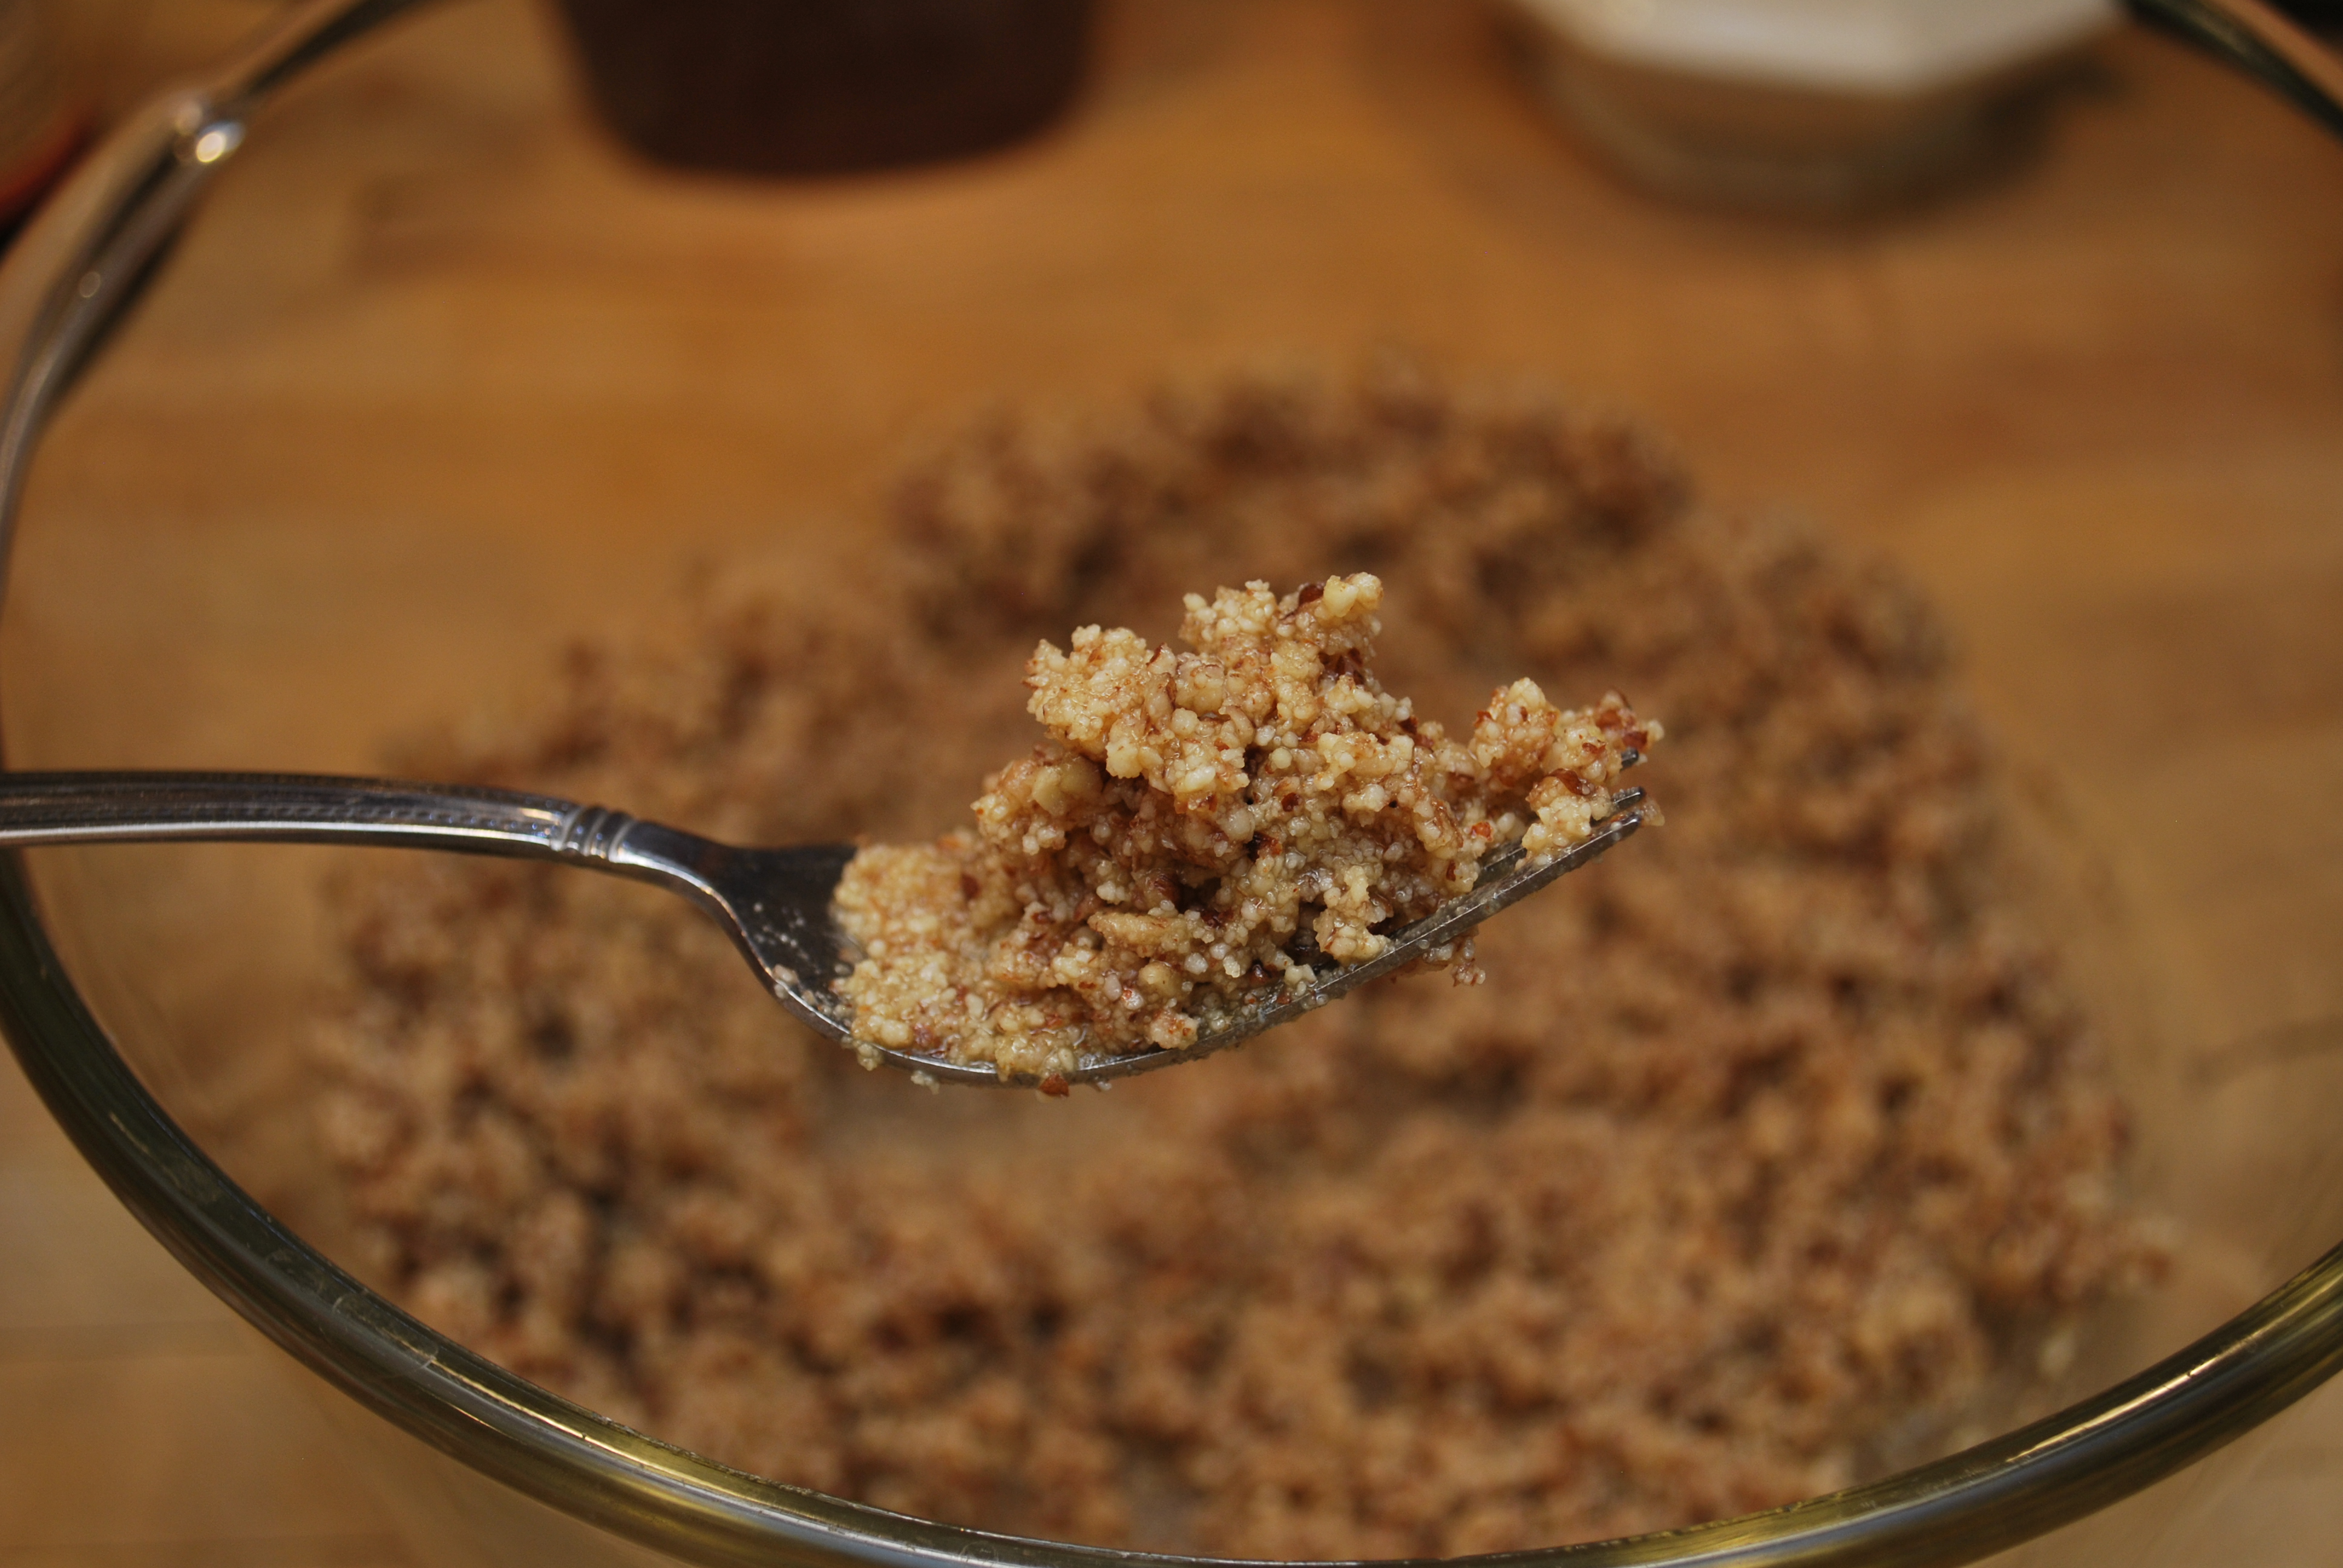
Add the chopped pecans, almond flour and salt to a large bowl. Mix in the butter (or coconut oil), vanilla extract and honey, if desired. I chose to use butter in mine because butter is delicious. I don’t need to explain myself any further. Stir wet and dry ingredients together until completely combined. The mixture will be sticky and pliable, like so:

DSC_9590

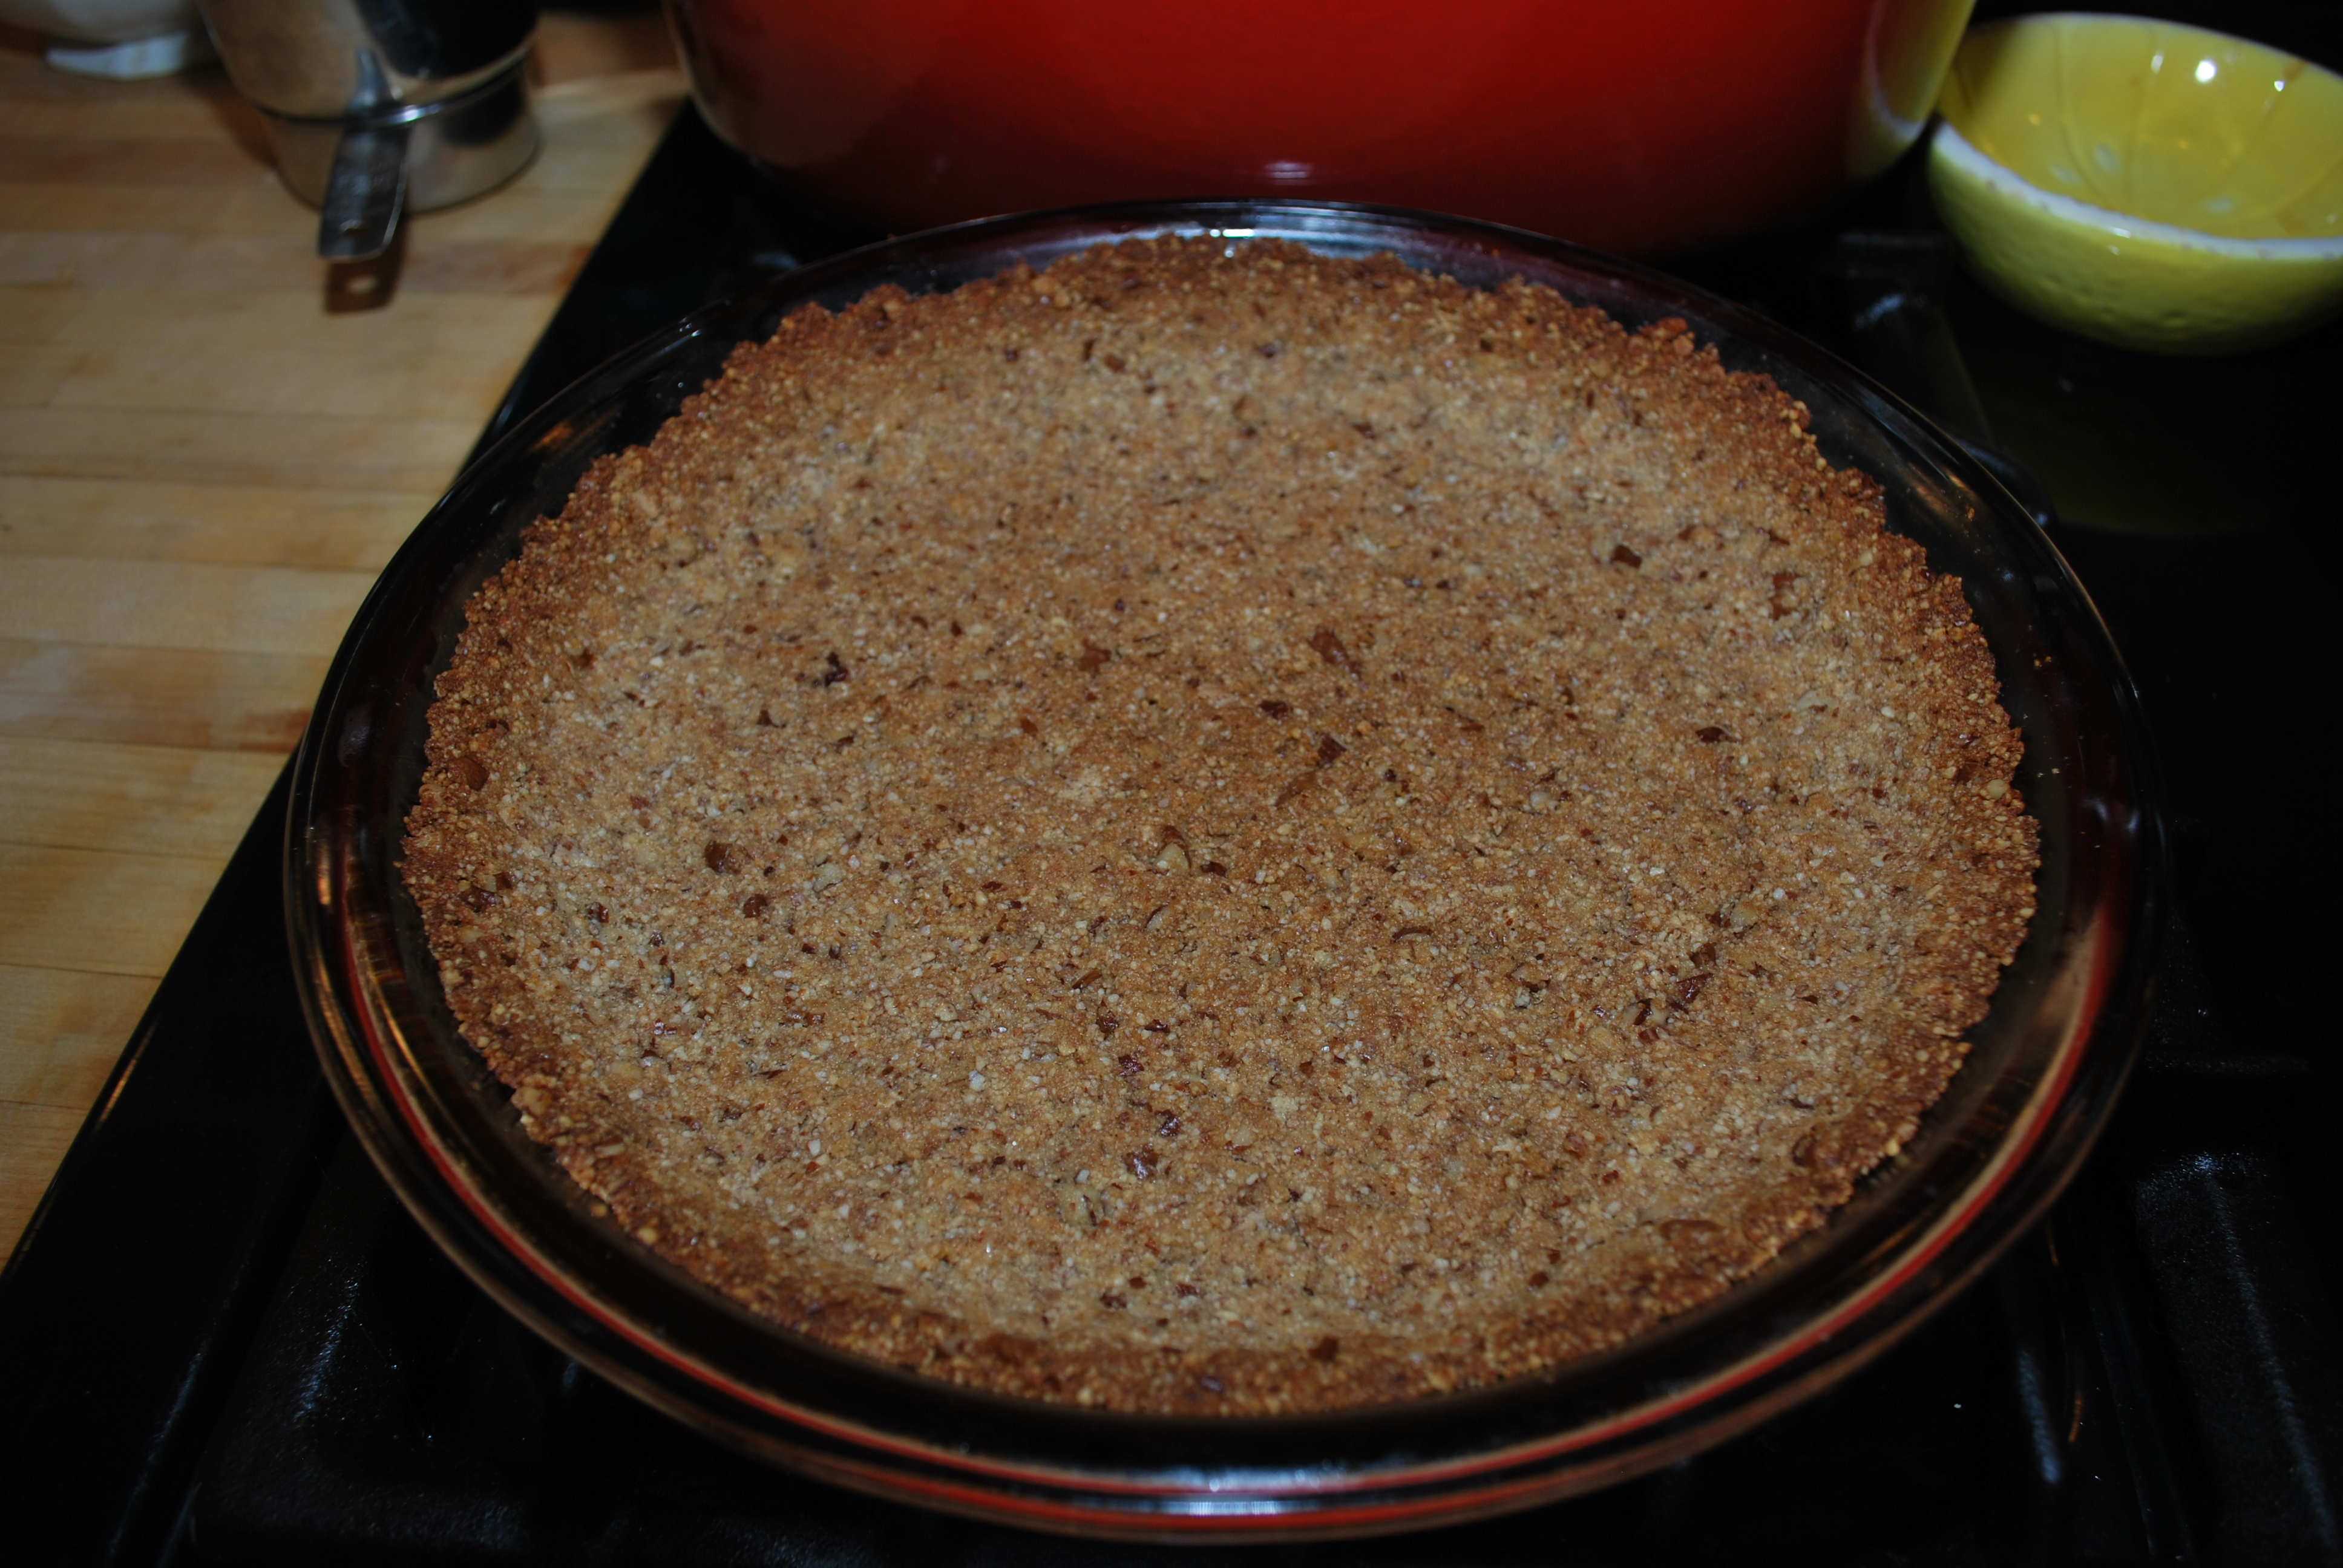
Using your fingers, press the dough into a 9.5-inch pie pan. I think mine was a little smaller, but it worked out just fine. A larger pan will yield a thinner crust and a smaller pan will give you a crust that’s a little thicker. The key is to try to get the dough evenly distributed. If your hands get too sticky, you can run them under a little water and work with slightly dampened hands.

DSC_9597

Bake for about 12 to 14 minutes or until the crust is golden brown. Remove and set on a baking rack to cool while you make the delicious banana pie innards, also known as the filling.

DSC_9637

The key to this pie – and this is very important – is that you should use the ripest bananas you can get. The bananas to be used will be far beyond what I consider edible, but their sugar content will be highest at this point. Since there’s no sugar added to the filling, you need to make sure these bananas as sweet as possible. You can leave a bunch of bananas on the counter for a week, ask your grocer for the “extra” ripe ones they usually have in the back or you can hack-ripen the bananas by putting the in a paper bag with a tomato or an apple. Just make sure they look like these guys:

DSC_9623

Now that the banana business is out of the way, you can make the pudding. You’ll see, there’s absolutely no reason you should ever make a box mix of pudding after giving this recipe a try. Sure, it take a little more time to do, but it’s not difficult and the proof is in the… you know.

In a large pot over medium heat, whisk together coconut milk, egg yolks and vanilla. Just watch the heat, you don’t want to curdle the liquid and end up with coconut scrambled eggs.

DSC_9615

Stir constantly with a whisk or wooden spoon until the mixture starts to thicken. If you can draw a line on the back of the spoon and the pudding doesn’t run back together, it’s thick enough. Remove from the heat.

DSC_9638

In a separate small frying pan, heat the coconut oil and coconut butter over medium heat. Add the bananas, slightly smashed, along with the cinnamon. Cook until the bananas are slightly caramelized and browned.

DSC_9644

Put the cooked banana mixture and the custard base in a blender or food processor and blend until smooth and creamy.  Then pour the pudding into your cooled pie crust and decorate with sliced bananas. I used two bananas to decorate my pie. Make sure to cover the pie with a layer of plastic wrap soon after filling and decorating to prevent a skin from forming. Refrigerate that baby and share this pie with people you love.

DSC_9665

I had planned on making some coconut whipped cream to accompany this pie but got lazy. I still think that would be a nice addition to this dessert. My first impression of the pie is how much it reminded me of my grandmother’s banana pudding, despite all of the obvious differences in ingredients. I was also pleasantly surprised with the texture, which held up to slicing, and the flavor, which was incredibly and perfectly sweet despite not having any added sugar or sweeteners. The crust was buttery and crunchy like a healthy version of a graham cracker crust. But what surprised me most was that the crust stayed crisp for the full four days it took us to eat up this pie. I almost regret this crispness since there was no comparable soggy-Nilla wafer experience.

There’s a note from the authors that this would be really tasty served frozen and I tend to agree with that. If you really wanted to go off the deep end, you could also add some chocolate in the mix.

I took the liberty of marrying the crust recipe with the pudding recipe and I stand by that decision but even without a crust, this pudding is really impressive. I think it would be hard to find a more delicious, rich and satisfying gluten- and sugar-free dessert… made with whole foods. This is definitely one I’m planning on making again, and soon!

Sure, this isn’t quite banana pudding and it’s not quite banana cream pie but it’s damn fine, as Agent Cooper would say. And since this isn’t an overhaul of any specific American dessert, I feel confident that I am safe from the wrath of any Paula Deen devotees out there.

Here’s hoping you give these recipes a try!

Tagged , , , , ,

Five Nut Caramel Tart – Who Needs Pecan Pie?

DSC_9823

I’m from the South and in many ways, heartily appreciate the food culture from that part of the country. Collard greens, black-eyed peas, fried chicken, fried okra, fried green tomatoes…okay, fried everything. But, the one Southern comfort food I cannot handle is pecan pie. Whether you call it “PEE-can” or “pe-CON” pie, this sticky, overly sweetened confection is one of the worst desserts to have come from the South, in my opinion.

Most pecan pies are little more than a pastry filled with corn syrup, table sugar, eggs, vanilla and pecans. These beautiful nuts, already sweet and delicious on their own, are drowned in a pool of corn syrup, completely masking any discernible nut flavor. You are left with a crunchy, chewy mass, lacking any semblance of flavor complexity. If this diabetes-inducing treat isn’t sweet enough for you, never fear! Thanks to Pinterest, you can find countless incarnations of this dessert that utilize candy bars, chocolate, bourbon and so much more. Sick.

Given my obvious disgust for pecan pie, I was surprised to find that a recipe for a Five Nut Caramel Tart would pique any interest. Although pecans are not one of the five nuts required for this recipe, there are some obvious similarities between this tart and the classic pecan pie. You have pastry and you have nuts, but in lieu of a bed of corn syrup, the nuts are coated in a delicious homemade caramel sauce and sprinkled with coarse sea salt. Crunchy, chewy, salty and sweet but not a lick of Karo Syrup. Now that’s a dessert I can get excited about.

This recipe is from the book, The Splendid Table’s How to Eat Weekends. I adore The Splendid Table public radio program hosted by Lynn Rossetto Kasper and have enjoyed many recipes from this franchise. This particular cookbook is dedicated to weekend cooking, an endeavor which requires more time but one that can result in fantastic meals. The recipes in this cookbook may take a little more time and a little more skill but do seem very promising. Since my good friend Kim requested that I attempt to make a pastry as one of my 100 First Tastes this year, this Five Nut Caramel Tart is dedicated to her!

As I’ve said before, baking is a science! I usually take some liberties with other recipes but since this is baking, I followed the instructions and recipe ingredients accurately. Here is the recipe:

 PASTRY

1 1/4 cup unbleached all-purpose flour

3 tablespoons granulated sugar

1/4 teaspoon salt

1 stick (4 ounces) cold, unsalted butter (plus more for buttering the pan)

2 large egg yolks

1 1/2 tablespoons ice water

FILLING

1 stick (4 ounces) unsalted butter

1/2 cup dark brown sugar (packed)

1/4 cup honey

2 tablespoons granulated sugar

1 cup toasted salted cashews

2/3 cup toasted salted macadamia nuts

1/2 cup whole blanched almonds

1/3 cup salted, shelled pistachios

1/4 cup pine nuts

2 tablespoons heavy cream

1 1/2 teaspoons coarse sea salt

For this recipe, you’ll need a tart pan or some other comparable pan with a false bottom. The recipe did call for an eleven-inch diameter pan but I only own a nine-inch tart pan, so that’s what I used. This recipe also comes together best if you have a food processor to make the pastry, but you can totally do that by hand if you prefer to.

The first thing you’ll need to do is make the pastry. In all the years I’ve been baking, I’ve never made this kind of pastry before so I was very excited to give this a try. I typically make a standard pie crust but this pastry is more like a shortbread, buttery and a little crumbly rather than flaky.

Measure out your flour using the “dip and level” method. Simply dip the measuring cup into your flour to pull out a heaping pile. Use the back of a butter knife to level off the flour by sweeping off the excess with the straight edge. This fills the measuring container without packing the flour down. No sifting required for this recipe. Hooray!

DSC_9790

Add the flour, sugar and salt to your food processor and give it a quick pulse to blend the dry ingredients. Next add the stick of cold butter (cut into pieces) into the food processor and pulse until the mixture resembles coarse meal.

DSC_9803

Separate egg yolks from the egg whites. The recipe actually called for one and a half egg yolks but I have no clue how I would do that accurately so I just used two full egg yolks. Save the egg whites for another use and add the cold water to your egg yolks.

DSC_9777

Add the yolk and water mixture to the food processor and pulse until the dough begins to form. At the half way point, the dough will look like cheese curds or cooked cauliflower. Keep going until you have a large dough ball rolling around the container.

DSC_9808

The finished dough will look like this. Take care not to over-blend the dough. You don’t want to handle it too much.

DSC_9810

Gather the dough and flatten it into a disc. Wrap in plastic and let rest in the fridge for at least half an hour. While the dough is resting, preheat your oven to 400 degrees and place the rack in the center of your oven.

DSC_9813

Butter your tart pan. Make sure to get the sides too! There may be some dripping, so bake the tart on a lined sheet pan.

DSC_9861

Remove the dough from the fridge and let rest for a few minutes to soften. Press the dough out evenly with your hands to a thickness of about 1/8 inch. I’m certain my crust wasn’t even and was definitely thicker than 1/8 of an inch. It didn’t seem like an issue to me. Just do your best, this recipe is pretty forgiving! Press dough up the sides of the pan and trim of excess with a knife.

DSC_9865

Once your crust is all situated, you’ll need to refrigerate the pastry AGAIN. This can stay in the fridge for a minimum of thirty minutes or overnight. While that’s cooling down, get out your pie weights.

What’s that you say? You don’t own any pie weights? You have no clue what a pie weight is? Not a problem! I keep a jar of dry beans around to use as weights when making a pre-bake crust or pastry. Any dry bean will do and these are much, much cheaper than getting a set of pie weights, which are nothing more than a metal string of pearls to help keep your pastry from sliding down.

DSC_9883

Remove your cooled pastry from the refrigerator, gently line with parchment paper and fill to the rim with your baking beans or pie weights. Bake for ten minutes.

DSC_9885

After ten minutes, remove the beans and paper. Bake for an additional ten minutes or longer until the tart shell is golden brown. Cool completely on a rack.

DSC_9898

While that’s cooling, make your filling and reduce the oven temperature to 350 degrees. In a heavy 2 quart saucepan, combine butter, sugars and honey. Cook over low heat until the sugars completely dissolve.

DSC_9902

Once dissolved, raise the heat and whisk until the mixture comes to a boil. Boil for one minute, or until large bubbles form.

DSC_9915

Next, stir in the nut mixture and the cream. Turn off heat and combine thoroughly.

DSC_9922

Immediately pour the filling into the tart shell and bake for about 20 minutes or until the filling bubbles. Remove the tart and cool on a baking sheet. Sprinkle with sea salt to taste. Once the tart has begun to cool, you can remove the side of the pan to expose the crust.

DSC_9962

The final step? Slice this baby up with a sharp knife and enjoy with a cup of coffee or a tall glass of milk.

DSC_9958

This recipe serves eight to ten people and will hold for about four days but is absolutely the best the first day it’s baked. You can keep it in the fridge but remove it a few minutes earlier than you’d like to cut it up so the caramel can come to room temperature.

This tart is really impressive. It took quite some time to put together but only because there was a lot of downtime with the pastry prep and resting. There’s nothing very technical about this recipe and the dough was super easy to work with. Even with no pastry or baking experience, this recipe is easy to tackle.

Although I wouldn’t mess with the pastry recipe, I would say you could change the nut combination if you have a preference or distaste for certain nuts. Dan liked the macadamia nuts the best but I thought the almonds and cashews stole the show. We both thought that the pine nuts weren’t very noticeable and would leave those out next time because those things are super pricey!

The toasted nuts provide distinct textural experiences and flavors. The crust is buttery and slightly crumbly. The caramel sauce is SO good with just the right amount of sweetness. Furthermore, this thing looks seriously professional. This tart is what a pecan pie should be, highlighting the flavors of these nuts rather than submerging them in a sea of corn syrup. It reminds me of a highly elevated Payday candy bar, with fancy nuts instead of peanuts.

It’s true, I’ve probably alienated some people with my complete abhorrence of pecan pie, but before you write me off altogether, maybe give this recipe a try? See how delicious a nut-based dessert can taste.  I’m as health conscious as the next person but sometimes a girl (or guy) just needs a really naughty dessert. When you get a craving like that, don’t waste your time on a store-bought treat or a corn-syrup laden disaster like the classic pecan pie. Instead, why not try your hand at a Five Nut Caramel Tart and see what a decadent dessert can really taste like?

You won’t be sorry.

Tagged , , , , , ,

Spring Equinox Inspiration – Homemade Salad Dressings!

DSC_9414

As a Florida native, the first day of Spring, or any change of season for that matter, was hardly discernible. Most days were sunny and hot, or sunny and slightly less hot. Now that I live in a state that experiences noticeable changes in the seasons, today, the first day of Spring is truly an exciting prospect!

Where there were once piles of snow, daffodils and other bulbous perennials are blossoming. The familiar whir of lawn mowers has returned to the neighborhood, admittedly, something I didn’t miss much. However, the most exciting prospect of Spring for me is the impending arrival of young, tender lettuces. I have been a slave to winter squash, cooking greens and lots of onions and garlic for the last three months and am giddy at the thought of some locally grown spring lettuces.

Hey, I know not everyone is nearly as enthusiastic about salad greens as I am, so in an attempt to spur on some pro-lettuce sentiment, I want to share some salad dressing recipes I recently made. Salads can range from the dull to the overly complex but if you want to get in your daily serving of raw veggies, a salad is a great option. There are a ton of creative approaches to making a satisfying salad but if you are in a hurry, or aren’t much of a salad eater, the best approach is to serve your greens with a delicious dressing.

It’s probably been years since I have bought pre-made salad dressing from the grocery store. We tend to whip up a quick vinaigrette for our salads which typically consists of olive oil, whatever kind of acid we feel like (balsamic, red wine, apple cider, kombucha, lemon juice, etc.) and some seasonings. Now, I really enjoy these homemade dressings but swapping out red wine vinegar for apple cider vinegar isn’t much of a stretch and doesn’t offer much variation in flavor. It’s easy to get burnt out on salads when it feels like you’re eating the same thing over and over again.

So, for a little salad inspiration, I hit up The Complete Book of Raw Food. Sure, there are some fantastic vegan raw food recipes in this book that aren’t salad, but the truth is there is a full chapter, 37 pages, dedicated solely to salads and dressings. The odds were in my favor for finding some interesting ways to dress a salad. I found four recipes from this book and went to my old standby, Nourishing Traditions, for a fifth non-raw/vegan salad dressing recipe. Here are the dressings I made:

  • Premier French Dressing
  • Sweet Basil Oil Salad Dressing
  • Green Onion Dressing
  • Creamy Cumin Salad Dressing
  • Blue Cheese Vinaigrette

The only special equipment you’ll need to make these dressings is a blender or a food processor! A blender makes really quick work of these dressings and the high-speed blade helps to emulsify the oils which in turn, gives you a really thick dressing, which is very satisfying.

Although four out of five recipes that I made came from a raw food cookbook, some of the recipes call for honey – which is not vegan or soy sauce (tamari) – which is typically not raw. This cookbook was published in 2004, possibly before the current raw food standards were in place. No matter what your eating habits are, I guarantee one of these easy and delicious salad dressings will be right for you!

DSC_9454

Premier French Dressing – The Complete Book of Raw Food

This dressing, created by Nomi Shannon, was the simplest to make and was one of my favorites. It’s the closest to the quick vinaigrettes I usually make and is furthest from the last French dressing I ate, which is fine with me. This dressing doesn’t call for any special equipment and you can whip it up in a bowl with a fork just before you sit down to eat. I doubled the recipe, to serve two. Here’s the modified recipe I used:

8 tablespoons flax seed oil

juice of 1 to 2 lemons

1 teaspoon grade B maple syrup

3 teaspoons soy sauce, tamari, coconut aminos or a pinch of sea salt

1/2 teaspoon sesame oil (optional)

Whisk all ingredients together in a bowl with a fork and pour over your salad. This salad dressing is one size fits all. It will be delicious with any salad you put together. I used this one in a green salad with roasted sweet potatoes, shallots, massaged kale and pumpkin seeds. Yummy!

Sweet Basil Oil Salad Dressing – The Complete Book of Raw Food

This dressing was Dan’s favorite. It’s so light and very tropical tasting. It reminded me of a delicious pesto in dressing form. If you are a fan of Thai food, this is a great base for an Asian-style salad. This recipe was created by Natt Amsden and yields three cups of dressing. Here’s the modified recipe I used:

1 cup coconut water

1/2 cup cold pressed extra virgin olive oil

1 cup fresh organic basil leaves

2 cloves garlic

juice of 2 lemons (or more to taste)

1/8 cup nama shoyu, soy sauce, tamari or coconut aminos

pinch of sea salt

1/4 cup organic medjool dates, pits removed

Put everything into the blender and mix until liquified. Taste and adjust seasoning to your preference. You can substitute the basil for mint, dill, cilantro or tarragon for a different flavor variation. This dressing is very thin because of the coconut water and lemon juice so won’t cling to you salad as much as a typical dressing would.

I used this dressing as a base for an Asian-style salad I came up with. Chop up bell peppers, red onions, carrots and cucumbers. Mince basil, cilantro and mint and add to the chopped veggies. Season with pepper, crushed red pepper, lime juice, sesame seeds, fish sauce (optional) and toasted sesame oil to taste. Let marinate and serve on a bed of green lettuce. Top with toasted cashew nuts. I also broiled some wild caught salmon to go with this salad. This one reminded me of a fresh roll, in salad form. Super tasty!

Green Onion Dressing – The Complete Book of Raw Food

This dressing is another great one for the spring season, since it uses green onions as the base of the dressing. This dressing is a fairly thick and robust dressing and yields about three cups. It was created by Jalissa Letendre. Here’s the modified recipe I used:

1 bunch of green onions

1 cup cold pressed extra virgin olive oil

2/3 cup raw apple cider vinegar

1/8 cup raw honey (or use alternative sweetener of your choice)

1 1/2 teaspoon sea salt

Put all of the ingredients into the blender and mix until creamy. I roughly chopped the onions up but used the whole plant, including the white root ends. If you aren’t a fan of slightly sweet dressings, I would omit the honey. I used this dressing in the green salad with roasted sweet potatoes, shallots, massaged kale and pumpkin seeds. Before I prepared the rest of that green salad, I massaged some minced kale with this onion dressing and added it to the other ingredients. Using two salad dressings in that salad make for a really complex and interesting meal. Massaging the kale with this dressing also helped to tenderize it and make it easier to digest!

Creamy Cumin Salad Dressing – The Complete Book of Raw Food

This dressing took the longest to make and really reminds me more of a dip than a dressing. It is super thick and creamy, uses only whole ingredients and is 100% vegan. The thickening agent in this dressing is soaked sunflower seeds! This dressing was created by Elaina Lova and serves six to eight people. Here’s the recipe I used:

3/4 cup raw organic sunflower seeds, soaked in water for 2 hours

3 cloves garlic

1 cup cilantro

2 teaspoons sea salt

2 lemons, juiced

1/8 cup flax, hemp or olive oil

1/2 teaspoon cumin powder

1 cup water

After soaking your sunflower seeds, drain and rinse. Add all ingredients to your blender and process thoroughly. This dressing is thick and will thicken even more in your refrigerator, you can add more water until you reach your desired consistency.

The suggested serving is over a green salad, which would be great, but my suggestion is to make a Tex-Mex salad with tomatoes, beans, corn, the works. Even better, this would be a great addition to a seven-layer dip (since it’s so thick) or even a great taco dipping sauce. The cilantro and cumin really stand out in this tasty dressing.

Blue Cheese Vinaigrette – Nourishing Traditions

Alright, alright I just can’t stay away from my favorite go-to cookbook, Nourishing Traditions. The thing is, this book always has what I’m looking for. I had a block of Roquefort cheese in my fridge for a month now and really needed to come up with some use for it. Instead of a traditional creamy blue cheese dressing, I wanted to give a vinaigrette a try. This recipe yields 2 cups of dressing. I combined a few recipes to create this modified blue cheese dressing:

2 teaspoons Dijon mustard

2 cloves garlic, pressed

5 tablespoons red wine vinegar

2 anchovy fillets

1 cup cold pressed extra virgin olive oil

2 tablespoons expeller pressed flax seed oil

4 to 8 tablespoons crumbled blue cheese

Blend mustard, garlic, anchovies and vinegar in a food processor. While continuously running, add oils in a stream until oil is well mixed and emulsified. The dressing base will be very thick if you used a food processor. You can also do this by hand, if you are fast! Once emulsified, stir in crumbled blue cheese with a fork.

I made a healthy version of a steakhouse salad. You know the kind. While Dan broiled a grass-fed ribeye in the oven, I prepared a salad of spinach, mixed greens, red onion and (healthfully) candied pecans. I sliced the beef up thinly and tossed everything in the blue cheese vinaigrette. It was REALLY good.

I stored all of these dressings in mason-type jars with tight-fitting lids. Most will last for two weeks, some longer. Having a fridge full of dressings makes is great because most of the work is already done. If I’m not feeling creative, I can just rinse off some greens and toss with the dressing of my choice.

Many of these dressings would make fantastic marinades too once you’ve had your fill of salad. The Premier French Dressing and Sweet Basil Oil Salad Dressing are both great options for second round cooking.

Hopefully I have inspired a few of you to think outside the box when it comes to salads. I may not subscribe to, “Clothes makes the man” but I definitely can get behind, “the dressing makes the salad”.

Happy Vernal Equinox!

Tagged , , , , ,

Bacon Brownies – How Are These Not Delicious?

DSC_9264

Well, it had to happen eventually. It’s unrealistic for all 100 recipes I make this year to be knockouts so I shouldn’t be disappointed that the thirteenth recipe I made was a bust. The truth is, I had such high expectations for this one: Paleo Bacon Brownies.

When my friend Mandy posted a picture of a batch of dark chocolate brownies, sprinkled with crisp bacon pieces, I just knew I wanted to sink my teeth into that sweet-savory dessert. When I got the recipe and saw that these were grain-free and were also fortified with coffee, I wasted no more time and made a date with my oven.

Like sea salt caramel before it, bacon has now taken over as the darling ingredient in popular cuisine. Just stop by any cupcake shop, modern bakery or dessert bar and you’ll see at least one dessert laden with the always popular cured meat. America’s obsession with sweet and salty in one bite must be responsible for this bacon dessert craze. It’s not limited to dessert, mind you. I’ve seen bacon beer, bacon vodka, bacon candy and for the purists who don’t care to muddle their bacon with other ingredients but just want more bacon, there’s the ever popular bacon weave.

I am not immune to the bacon craze. I was raised in the south and enjoyed bacon at the breakfast table with some regularity. My family, being from East Tennessee, taught me at a young age that the only way to enjoy canned green beans is to cook them down in a few tablespoons of bacon grease for hours until little to no nutritional value remained. I have dabbled in bacon-for-dessert myself. My grandmother has a killer recipe for something we lovingly call S.O.B. – Special Occasion Bacon, which consists of thick-sliced bacon dredged in equal parts brown sugar and freshly cracked pepper and baked in the oven until you are left with essentially bacon candy. A few years ago, I rang in the new year with some friends, a glass of Champaign and a loaf of homemade bacon monkey bread. What better way to start a new year?

So, this recipe was a little disappointing but perhaps it’s because I have high bacony expectations? I should also confess that my all time favorite dessert would be the humble homemade brownie. I have very strong feelings about brownies. My bacon and brownie bias likely was a difficult hurdle to overcome.

Despite this recipe not ranking as highly as I would have liked, I think lots of other people would probably really like this dessert. It does have a lot to offer. To start, the texture is aces. It’s really a very fudgy brownie which is exactly the kind of brownie I like best. It’s also grain-free/Paleo, only sweetened with maple syrup and is highly caffeinated for those of you who enjoy a little pick me up with your dessert. This recipe is from Everyday Paleo which is a great cookbook for people looking for quick Paleo recipes that the whole family can enjoy. Here’s the recipe I used:

 8 ounces dark chocolate

1/2 cup reserved bacon fat

1/2 cup coconut oil or butter

6 eggs

4 tablespoons strong brewed coffee

4 tablespoons fine coffee grounds

1 cup Grade B maple syrup

1 cup unsweetened cocoa powder

6-7 pieces of baked bacon

So, if you want to give it a try, even given my less-than-stellar personal review, here’s how it’s done.

Preheat your oven to 375 degrees. In a small saucepan over medium heat, melt the chocolate, bacon fat and the oil or butter. Make sure to stir often to prevent burning. This can also be done over a double boiler. Once melted, set aside to cool.

DSC_9111

Mix the eggs and maple syrup together until well blended. Next, you can mix in the cooled chocolate mixture.

DSC_9128

Make sure you start out with a large bowl! I had to transfer the mixture to a larger bowl at this point. This is when it pays to really read the instructions properly before starting to cook. Whoops!

DSC_9132

Next, you can sift in the cocoa powder slowly and whisk into wet ingredients. Once cocoa is well blended, you can mix in the brewed coffee and coffee grounds.

DSC_9139

Pour batter into an oiled 13×9 pan. Chop up your bacon slices and sprinkle on top. Bake for about 30 minutes or until toothpick comes out clean.

DSC_9176

Remove from the oven, cool and slice up!

DSC_9180

There you have it, Paleo Bacon Brownies. Maybe it’s harsh of me to say these aren’t delicious. They’re not my favorite but hey, they might just be your cup or tea… or piece of brownie for that matter. Truman Capote had great quote about failure that seems apropos:

“Failure is the condiment that gives success its flavor.”                                  

Hey, I have 87 more recipes to go and I can’t let this one get me down. When it comes to bacon, I’d just assume enjoy it fresh out of the oven, or wrapped around a meatloaf. And when it comes to brownies, there’s nothing that can top my grandma’s extra dark chocolate variety… except maybe this gluten-free recipe from Elana’s Pantry.

Coffee, chocolate and bacon – a culinary trifecta of vices. You may have let me down this time, but I will have my revenge.

Tagged , , , ,

Cooking with Beer – Pork Saison Dumplings

DSC_9248

Beer, it’s not just for drinking anymore. Beer is a uniter of people, a gastronomical statement and a damn fine ingredient in the kitchen. I, like many people I know, am a lover of beer. Although my parent’s generation loyally consumed uninspired, yet tasty pints of Hamm’s or Blatz beer, my generation has a veritable universe of beers to choose from. America’s love of beer, particularly the craft and imported varieties, has grown to impressive heights and shows no sign of stopping.

If you are new to the world of beer, and I mean good beer, it can be a little overwhelming to try new varieties. It’s hard to know where to start, let alone how each beer variety differs. Fortunately, good beer is easy to come by these days and with hardly any effort, you can learn how to choose the beer for you. Which for me, is every kind.

One great way to try out some new beers is to find recipes that call for beer as an ingredient. Most beer-based recipes call for less than a full bottle of beer, so you can use a little in your meal and enjoy the rest of the bottle while you’re cooking. Now that’s motivation to get in the kitchen.

Dan and I have been subscribing to BeerAdvocate magazine for a year or so. Not only is this publication a great way to keep up with the ever-growing beer culture but there’s also a great cooking column in each issue.

We recently purchased a quarter pasture raised hog from our local organic farm and have an enormous amount of pork products to plow through this year. Now, when it comes to chops, ham and bacon, I need no instruction or inspiration. But when faced with seven pounds of ground pork, I need a little assistance. Fortunately, Dan and I remembered that there were some pork dumpling recipes in an issue of BeerAdvocate. After some time thumbing through our hefty pile of beer literature, we found the one we were looking for in Issue #63 – Pork Kimchi Saison Dumplings. The original recipe called for ground chicken or turkey but we swapped that out for the ground pork. Here’s the modified recipe.

1 pound pasture-raised ground pork

4 tablespoons Saison – we used Crooked Stave Saison Vieille Artisanal

1 teaspoon tamari, soy sauce or coconut aminos

2 tablespoons arrowroot powder, or corn starch

10 tablespoons spicy kimchi, finely chopped

6 tablespoons cilantro, chopped

1 teaspoon fresh ginger, grated

1 teaspoon garlic, minced

45 gyoza or wonton wrappers

We also made a delicious Stout Soy Dipping Sauce to accompany our dumplings. Here’s the recipe we used.

1/4 cup tamari, soy sauce or coconut aminos

3 tablespoons Stout – we used The Lost Abbeys Serpent’s Stout

1 tablespoon garlic chili sauce

1 teaspoon honey

1 teaspoon fresh ginger, grated

1 teaspoon garlic, minced

3 scallions, finely chopped

Here’s the thing about making dumplings at home. They take FOREVER, this is not a quick meal. The night we made these dumplings (we did make two batches, about 100 individual dumplings), we didn’t eat until 9:00pm. That was just poor planning on our part but seriously, these are a lot of work. The saving grace is that there is absolutely NO comparison to dumplings you can buy at the store or in a restaurant. These little pork morsels are infinitely better, and besides, you get to drink all of the extra beer from the recipe while you work! Not a bad trade-off.

The first step is to get all of the ingredients out and prepped. It’s helpful to chop, grate and mince everything in advance so you can just throw everything into the bowl at once.

DSC_9205

The recipe we followed gave a specific order of operations but I didn’t think that was necessary. These take long enough, no need to drag this out by adding extra steps to the process. Get all of your ingredients (except for the wrappers) into a bowl and mix thoroughly.

DSC_9211

I find it helpful to do a little taste test of the stuffing before you commit to making the dumplings. Fry up a little in a pan and see if you need to adjust the flavor. I added extra cilantro and kimchi to the stuffing after the taste test. Once the flavor is where you want it to be, cover and refrigerate for at least an hour before making the dumplings.

DSC_9221

While the pork is hanging out in the fridge, you can make the dipping sauce! It’s as simple as measuring out the ingredients and mixing them thoroughly in a small bowl. Again, give it a taste and adjust accordingly for spiciness, sweetness and saltiness. You can store this in the refrigerator until you’re ready to eat. It will last several days refrigerated, so you can make it in advance.

DSC_9225

Now to make the dumplings. This, admittedly, can be a little tricky but once you’ve made a few, you’ll be good to go. We opted for the half moon dumpling fold, which is the easiest and fastest. There are many different ways to fold dumplings and plenty of information about this online if you want to get more creative.

The first step is to make an egg wash, which will be the glue to keep these suckers together. Just mix together one egg, one egg yolk and one tablespoon or water, beer or milk. Keep this in a bowl near your work area. Place one wrapper on your work surface. With your finger, lightly coat the edges with your egg.

DSC_9229

Next, take about a teaspoon of filling and place it in the center of your wrapper. I like to use two spoons for this process – one to measure and one to help get the filling centered.

DSC_9231

Fold the wrapper in half. Occasionally, these will crack or tear if you overfill the dumpling. Don’t worry, just keep on going!

DSC_9233

Pick up your dumpling and seal all of the edges. The goal is to get as much air as possible out of the dumpling and make sure that there are no gaps along the edge. We made several that were definitely not folded properly but fortunately these guys are very forgiving, particularly because we used the steaming method to cook them, rather than the frying method.

DSC_9234

Place your finished dumpling on a wax paper lined baking sheet and repeat these steps until you’ve run out of filling or wrappers. Make sure that the dumplings don’t touch each other as they have a tendency to stick together. You can add a second layer of dumplings to the tray if you separate the levels with a piece of wax paper.

DSC_9238

Now to cook these up! I used a medium pot and an old vegetable steamer that sits on the bottom just above the water. This method worked really well. Lightly coat the steamer with a little oil to prevent sticking and bring the water to a boil to create the steam. I was able to get between six to eight dumplings on the steamer each batch. Just make sure the dumplings aren’t touching each other. Cover with a lid and steam for about eight minutes.

DSC_9244 The dumplings will shrivel up around the filling when you remove the lid. Make sure to cut one open every once in a while to make sure the filling is completely cooked. You’ll also need to add additional water to the pot a few times to keep the steam going. I put the finished dumplings into an oiled baking dish and kept them in a 150 degree oven until we were ready to eat.

DSC_9246

We cooked up about half of the dumplings and froze the rest of them to cook up another time. When you’re ready to eat, serve with the dipping sauce and if you have any extra, some of that delicious beer!

DSC_9262

These dumplings are addictive. Chewy, spicy, salty and oh so tasty. Sure, they took forever to make but I got to try out two new beers and have a freezer full of dumplings for another time. It definitely helps to make a large batch of these and freeze half, so you can enjoy a quick meal some other time. I would add a few minutes on to your steaming time for frozen dumplings.

The stout dipping sauce really steals the show, in my opinion, and would be a great accompaniment to any kind of dumpling. If you don’t want to take the time to compile you’re own dumplings (even though I hope you will give it a try sometime) just whip together a batch of this dipping sauce and serve alongside some pre made dumplings.

If you want to save some time and increase the flavor of the filling, I would suggest making it a day in advance. You can even add a little more beer to the mix to intensify the flavor a bit. I think the addition of shredded carrots or cooked shiitake mushrooms to the filling would be really tasty too.

The lesson with these Pork Saison Dumplings? Don’t just drink your beer, cook with it too! Be creative and adventurous. And… if the recipe sucks, you can drown your sorrows in some tasty beer.

Tagged , , , , , , ,

Eat Your Heart Out LARA – Homemade Energy Bars

DSC_9107

You know that feeling you get when you see something so simple, so ingenious and it’s making someone a ton of money? When you say to yourself, “I can totally do that” and then you come back to reality, where laziness and apathy override any attempts at creativity and you say to yourself, “nah, I can just buy that.” 

I feel that way about most energy bars, particularly the ones sold at natural food stores. Those two ounce whole food bars are utter gold mines and I always feel resentful that I am paying for a few ingredients blended up, extruded out and beautifully packaged when I could totally make these at home and save a chunk of change. For years, I have been saying this about my favorite whole food snack, the Larabar.

The good folks at Larabar definitely know what they’re doing. Although their product line has expanded over the years, the simplest bar they make is their flagship line which boasts that each flavor has no more than nine ingredients and are little more than unsweetened fruits, nuts and spices. There are nearly 20 flavors to choose from, all of which are delicious configurations of these three ingredients – nuts, fruits and spices.

I have been convincing myself that I should make an attempt at homemade Larabars (or something close to them) for a long time but I always talk myself out of it, citing how long it would take and how many ingredients it would require. But a funny thing happened last night. Rather than making a batch of Paleo Bacon Brownies (which I do hope to get on sooner rather than later) Dan suggested that we make something out of the dates and coconut overloading our pantry. In a moment of weakness, I finally succumbed to the homemade energy bar.

I haven’t come across any recipes in my own cookbook collection for something close to an energy bar, so I did a quick internet search for “date paleo bar” and had over 2 million hits. Sheesh. Although not always the best approach to internet queries, I went with the first page on the list and it was perfect!  Thanks, Turtlewoman, for creating this great recipe. I modified it slightly, here’s the recipe we used:

1/3 cup raw cacao (or you can use regular cocoa powder)

1 1/2 cups raw, pitted Medjool dates

1/3 cup raw ground flax seed

1 teaspoon cinnamon

1/2 cup raw almonds (soaked and dehydrated work too)

1/2 cup raw walnuts (soaked and dehydrated work too)

1/2 cup raw coconut shavings

1 teaspoon vanilla extract

2 tablespoons raw, expeller pressed coconut oil

1/8 teaspoon sea salt (optional)

The original recipe called for dried fruit, such as Goji berries, cranberries or cherries but I swapped those out for coconut. I was going more for a chocolate coconut energy bar kind of a thing.

For this recipe, I used my food processor and also used the dry grain container on my Vitamix to grind the flax seeds into flax meal.

Flax seeds are interesting. If you eat them whole, you will barely get any nutritional benefit. The ol’, they went right through me routine. If you buy pre-packaged flax seed meal and expose it to air or light, it will become rancid and again, you will not benefit very much from that. My solution is to buy whole flax seeds and grind them up just before you use them. Even a tiny food processor will grind these fickle little seeds up for you. If you’re going to eat flax seeds, you might as well make it worth your while.

Steps one through three! Put the pitted dates into your food processor fitted with the s-blade attachment. If they are a little hard, I would add a tablespoon of warm water. Blend until a thick paste forms. Add chocolate, ground flax seeds, vanilla, cinnamon, coconut oil and salt. Pulse to blend thoroughly. Finally add the nuts and coconut. Pulse mixture until the nuts and coconut are to the size you desire. It should look something like this:

DSC_9086

Pour mixture onto a wax paper lined pan. Press mixture down with a wooden spoon or spatula until you have a rectangle shape about 1/2 inch thick. Another option is to just ditch this “bar” shape and roll out little spheres. I created little lines with a knife so I could cut equal sized bars. Once the loaf is the size and shape you are looking for, transfer to the fridge or freezer to cool until firm.

DSC_9096

Once firm, you can remove and slice up your energy bars. This made about 6 bars, weighing in about 2.5 ounces each. Store in an airtight container in your fridge. Keep each layer separated by a layer of wax paper to prevent sticking.

DSC_9101

Boom! Energy Bars. These things are AMAZING and seriously taste just like the real deal, even better! This is closest to the Chocolate Coconut Chew bar but tastes so much better with the addition of a little sea salt to the mix. Since these also have flax seed meal, coconut and coconut oil, there are a lot of really good fats in these homemade energy bars. Not to mention cinnamon which helps promote circulation and raw cacao which has a little caffeine boost. I am a jerk for not attempting these sooner.

These whole food energy bars are also raw, vegan, gluten-free, paleo and bottom line.. super tasty! They do have a base of dates, so there’s a fair amount of sugar in these suckers but at least you get plenty of dietary fiber along for the ride. This recipe is a great basic guideline for tons of other flavor combinations. Let your imagination run wild!

I can’t believe how long I’ve been putting this off. This was REALLY easy, and I don’t mean like making Shrimp Stock-easy. This is like 10 ingredients, 10 minutes, really rewarding snack-easy.

Listen to yourself this time, you can totally do this!

Tagged , , , , , , , , , , , , , , , , , ,

DIY Dry Aged Steak – Who Needs a Steakhouse?

Growing up, I didn’t eat much steak. For me and many others, going out to a steak dinner was a real treat. For an eight year old, little is more empowering than ordering your own steak and being the master of your own destiny at the baked potato station and salad bar. Occasionally, I could convince my parents to take me to what I considered to be a fine eating establishment, the highly coveted steak buffet, which offered not only your choice of steak, potato and salad options but also a self-serve soft serve machine with all the sprinkles you wanted. Glorious.

For a time, 12 years in fact, I gave up eating beef. After reading up on conventional beef production and the horrifying treatment of these animals, I just couldn’t do it. Not until I was able to source meat from organic, pasture-raised operations, who are given a good life, fed appropriately and treated humanely, did I eat beef again. Fortunately, there are many great sources for beef these days as the public has demanded to know where their food comes from and have formed a more intimate relationship with their food. Among others, Joel Salatin, American farmer, food activist and author can be thanked for helping to bring these issues to light. If you’re looking for an enlightening read, I would suggest picking up one of his many books. Two great ones I can recommend are Holy Cows and Hog Heaven: A Food Buyers Guide to Farm Friendly Food and Folks, This Ain’t Normal: A Farmer’s Advice for Happier Hens, Healthier People and a Better WorldJoel does ramble on a bit, as indicated by his highly verbose book titles, but he knows what he’s talking about.

It’s been almost one year since reintroducing beef into my diet. I have a lot to learn about how to prepare this protein since I missed out on over a decade of practice. There have been lots of ground beef meals, which seem fairly forgiving, and even a few attempts at roasts to varying degrees of success. So far, my favorite way to enjoy beef is a nice steak, grilled to medium rare doneness. Porterhouse is my favorite (just like my Dad) followed by the Ribeye.

My husband and I are lucky enough to live in a state with good access to quality, grass-fed beef. In the food world, there is a lot of controversy about this statement but I’m going there anyway:  cows are meant to eat grass, not corn or wheat or soy or candybars. The industrialized food system has introduced these “foods” to cattle to fatten them up quicker, and bring them to slaughter faster. It’s also arguably meant to make the beef cheaper for consumers.

All controversy aside, grass-fed beef has some measurable health benefits. Grass-fed beef is rich in omega 3 fatty acids, lower in fat than conventionally grown beef, higher in vitamins A and E and has higher levels of CLA (conjugated linoleic acid). The downside to grass-fed beef would be the price. It can be about $2.00-$3.00 more per pound than conventionally produced beef. A great way to save money on quality grass-fed beef is to purchase a share of beef from a local producer. You can save money, know exactly where your food is sourced from and also get to try a few new cuts that aren’t typically found at your supermarket.

Now, grass-fed beef, given its lower fat content does have something to prove to corn-fed beef. The flavor is delicious but does lack some of the richness of standard beef, which is usually much fattier. In order to kick up our grass-fed steak, Dan suggested that we attempt dry-aging it… at home. Every great steak you’ve ever had was likely dry-aged for around 30 days. Dry-aging is essentially a slow dehydration process that breaks down the muscle proteins, resulting in a dense, more tender steak. This breakdown of muscle simultaneously encourages the formation of peptides and amino acids, which impart a smokier and “meatier” taste.

Generally dry-aging is done large scale, in humid refrigerators set at between 32 and 40 degrees F. But according to my Cook’s Illustrated Cookbook, this can be replicated at home, in the back of your refrigerator. Since Cook’s Illustrated has yet to let me down, we decided to give it a go! We also decided to be very scientific about this and do a side by side comparison to an equally-sized non-dry aged cut, to see what the difference in flavor was.

Per Cook’s Illustrated, we purchased two thick cut ribeye steaks. They also recommend a strip steak as a good option for home dry aging. Both steaks measured in at about .94 lbs each and had about the same fat content and shape. While we dry aged one steak, the other steak was wrapped in plastic and kept in the freezer.

DSC_8941

With a square of cheesecloth, or a clean tea towel, wrap the steak up nicely. According to the instructions, this is done to prevent the steak from drying out too much since home refrigerators are less humid than commercial dry-aging units.

DSC_8957I created a sort-of burrito out of the tea towel and set the steak on a small baking sheet with a wire rack fitted. The theory here was to create an environment where air could move around the whole steak, rather than just the top. Put the steak (or steaks) in the back of your refrigerator, where the temperature is coldest. Then, just leave it alone for four (or in our case, five) days.

DSC_8966

On the fourth day, I removed the second steak from the freezer and let it thaw out in the fridge. On the fifth day, I removed the dry aged steak from its blanket and compared it to the other steak. There was a noticeable change in the size and color of the dry aged steak, as was expected. The weight went from .94 lbs to .78 lbs!

DSC_9067

Although Cook’s Illustrated didn’t specify, we decided to trim any really firm, dark pieces from the dry aged steak. With the use of a sharp knife, there wasn’t much additional loss of meat.

DSC_9069

Next, as we always do when grilling, we drizzled both steaks with a little olive oil and coated them generously with salt and pepper. Dan cooked them on a blazing hot grill until they were both cooked equally to about medium-rare doneness.

DSC_9074

After we grilled up the steaks, let them rest and divided them up on our plates, they pretty much looked the same. The steak below on the left, is the dry aged and the one on the right is the one we kept in the freezer. All that was left was the taste test.

DSC_9083

The verdict? The dry aged steak was noticeably more tender. Dan noted that we didn’t have to chew it as much, which I guess isn’t really the most appetizing review but a positive one, nonetheless, when it comes to steak. Since we were really concentrating on the flavor of these steaks, we agreed that the dry aged one was more “meaty” but that it was very subtle. The rendered fat on the dry aged steak, however, was far better than the non-dry aged steak  Both steaks were great but the dry aged one was definitely the superior steak.

Dan and I are sure that if we could dry age the steak even longer, the flavor would be that much more distinct. However, we had already “pushed the envelope” on this process since Cook’s Illustrated only felt comfortable with home dry aging four days, and we’d gone one more. I think we’ll add a few days on our dry aging next time and see what the consequences are. Live a little, eh?

So, was it worth it? I’d say yes. For the amount of work we had to put into dry aging, which amounts to little more than putting a diaper on it and sticking it in the back of the fridge, the reward is high. How many steaks have you cut with a butter knife, after all? The most difficult part is the wait, in my opinion. Dry aging really improved the flavor of our grass-fed steaks and we saved a TON of money by tackling this at home, rather than going to a steakhouse. Furthermore, I know where this steak came from, and that’s worth a lot to me.

So far, Cook’s Illustrated hasn’t let me down. I’m tempted to find the grossest recipe I can and give that a try. Tempt fate. There can’t seriously be 2,000 perfect recipes in this cookbook, can there?!

Tagged , , , , , , , , , , , ,

Geel Rys – Yellow Rice…er, Quinoa

DSC_9038

The perfect accompaniment to a pot of curry is either a heaping pile of rice or some sort of fried flat bread whose purpose is to assist you in shoveling heaping mounds of curry into your mouth. Don’t get me wrong, I love bread and rice but really try to keep consumption to a minimum. I am one of those weirdos who prefer to use properly prepared pseudo-grains like buckwheat, amaranth and quinoa in my kitchen. When it comes to wheat, rice, oats and even pseudo-grains, I try to limit my use as much as possible. I get more than enough grains in liquid form via beer, one of my great loves.

This swap-out approach has backfired on me more than a few times. For example, trying to make a “healthy” version of chocolate cake with whole spelt flour and date sugar was a near disaster. I have learned that it’s best just to have an occasional bite of the “real deal” and skip out on some of these alternative preparations that taste like crap.

There are times, however, when you can easily replace one ingredient for another with great success. Swapping out rice for quinoa, a pseudo-grain closely related to beets and spinach, for has worked out well for me in the past. I really enjoy quinoa, which has that chewy bite you’re looking for with cooked grains and is also a complete protein. When I was looking for something to accompany my Quick Chicken Curry  I found a recipe for Geel Rys, which is a South African preparation of Yellow Rice. This recipe for yellow rice from The Africa News Cookbook  is really different from the standard Spanish approach and was the perfect side dish for my pot of curry. The list of ingredients was pretty short and I just swapped out the rice for quinoa, out one-for-one. Here’s the recipe I used:

4 tablespoons oil or butter

2 cups quinoa (or rice, if you prefer)

2 sticks cinnamon

1 tsp salt

1 tsp turmeric

pinch of saffron (optional)

1 cup goji berries (or raisins)

This recipe can be made in a pot on the stove but I have always had great luck cooking quinoa in my rice cooker! It’s very little hassle and it can stay warm while you get the rest of your meal ready. If you are looking for a rice cooker, my recommendation is to find one with a stainless steel insert, rather than aluminum or non-stick. There are some food safety issues with both of those materials and stainless steel last much longer, anyway. If you aren’t interested in using a rice cooker, or don’t currently have one, just prepare this recipe on the stove. No problem!

Some people have gastric upset when eating grains. Quinoa, in particular, has a high saponin content which causes the grain to taste bitter and can upset your stomach. The traditional Peruvian preparation calls for a long soak in warm water, followed by a thorough rinsing to remove the antinutrients. Sometimes I do this, but generally I just give the quinoa a good rinse under running water. If you have a storied history with grains (pseudo or otherwise), I’d say give the traditional soak method a try.

In a pot over medium heat, or in your rice cooker, add the fat of your choice. I used ghee, but you can easily use a vegetable oil or skip out on it all together. Add the quinoa and mix thoroughly.

DSC_9020Once all of the quinoa is well coated with the fat, you can add the remaining ingredients. The recipe called for raisins, but I absolutely abhor raisins unless they are cooked in cinnamon bread. I used Goji berries instead. I actually don’t really care the the taste of Goji berries out of hand but they were perfect in this dish. Plus, Goji berries are the darling of the health food world. Often referred to as a super food, for what it’s worth.

DSC_9031 Combine all of the ingredients, add 2 cups of water and start up your rice cooker. If you are cooking on the stove, bring to a boil, cover and then reduce the heat to simmer.

DSC_9034After about 20 minutes, once all of the water is absorbed, your quinoa will be done! The quinoa will be tender but not mushy and the Goji berries will have plumped up. Give it a good stir and serve (hopefully with a delicious serving of Quick Chicken Curry)!

DSC_9042

I really enjoyed this new quinoa recipe and it was every bit as satisfying as the rice that typically accompanies curry dishes. This South African-spiced quinoa worked really well with the spicy curry I made but would be great enjoyed with lots of other dishes. One thing I would recommend is to remove the cinnamon sticks once it’s done cooking, especially if you plan to keep it warm in your rice cooker. I came back the next morning to a heaping pile of cinnamon flavored quinoa. Still tasty, but more along the lines of something I’d eat for breakfast.

Another tasty recipe down! Only 90 more to go.

Tagged , , , , , , , , , , , , , , ,

Kurma – Quick Chicken Curry

Curries. I love ’em. Thai, Indian, African – vegetarian or otherwise – they’re all so good. These perfectly spiced stews with complex flavors are one of my favorite meals. Truth be told, I haven’t had much luck making curry dishes at home. Inspired by some of my favorite dishes at local Indian or Ethiopian restaurants, my homemade versions always fall short of my expectations. Too spicy, too sweet or just missing some esoteric ingredient I can’t put my finger on, my curries have been edible but disappointing to say the least.

What’s even more frustrating is the time and super-long list of ingredients invested in making a fine curry. I seriously have more fenugreek seeds, cardamom pods and Garam Masala powder than I know what to do with. Buying in bulk at my local Indian grocery store seemed like the most cost-effective and logical approach…

After a recent inventory of my spice drawer, I felt it was time to give some homemade curry another chance. Maybe if I made a recipe that I had never eaten before, I wouldn’t be disappointed as there was no point of reference? Brilliant.

I do have a great Indian cookbook that I referenced for my very first recipe, but I remembered another cookbook in my collection that listed several curry dishes. The Africa News Cookbook  is another book of mysterious origin. I seem to remember borrowing it from someone years ago but can’t remember who. I remember briefly looking through this book for an Injera (Ethiopian flat bread) recipe but never got around to actually making that or anything else. So, like many other books in my collection, it sat unused, neglected (and unreturned to its rightful owner) on my bookshelf until this project.

I decided to make the Quick Chicken Curry Kurma of South African origin. This recipe caught my eye because it promised to be quick and had relatively few ingredients, most of which where already in my possession! Here’s the recipe:

1 chicken, cut into pieces

3 tablespoons ghee (clarified butter)

1 large onion, sliced

1-inch piece of fresh ginger, grated

3 cloves of garlic, sliced

1 stick cinnamon

2 cardamom pods

2 small chili peppers

1 cup of water or chicken stock

salt and pepper

Now I’m overzealous in the kitchen and also fairly frugal, so typically buy whole chickens, rather than parts, when they are on sale. For recipes like this, I just break down a whole chicken myself. Whole chickens are so much cheaper and are also great to have around for roasting whole or making AMAZING chicken stock (with the addition of a few chicken feet, of course). I am absolutely NOT formally trained in chicken butchery and have just taught myself how to do this by watching videos or reading cookbooks. You can see how I take down a chicken here, or find other -likely more accurate- resources on the world-wide web. Another option… just buy the chicken parts at your local butcher or grocery store. I don’t expect everyone to be as crazy as me!

Cutting up the chicken was the hardest part of this recipe but not even really that hard. It’s a good skill to have and one that I hope to improve on for sure! If you’re in a hurry, I would just opt for the pre-cut chicken pieces but would recommend finding bone-in since the bones help to give the sauce a richness and impart valuable minerals and gelatin, not to mention killer flavor! As always, find the best quality chicken you can afford. I like to get organic, pasure-raised chicken and stock up when they’re on sale.

Now for the rest of the ingredients! Pre-measure all of your dry spices and set those aside.

DSC_8993

Slice up your onion.

DSC_9000

And garlic.

DSC_8998

Grate the fresh ginger or mince it finely. I got this really cool ceramic grater years ago and it’s perfect for grating up ginger and other super-fibrous foods. I don’t really even bother peeling the ginger.

DSC_8994

In a large, heavy pot add the ghee (or other fat of your choice) over medium-high heat. If you’ve never used ghee before, you should run out and buy some right away! It has a high smoke point, great for pan frying, but is also super tasty! It’s like butter-squared. It’s very digestible (because the lactose from the milk solids has been removed) and is also available in a cultured variety, for even better digestion. I’m addicted to this stuff.

DSC_8997

Brown your chicken pieces in batches. I did this to render some of the fat out of the chicken and add a little more flavor to the curry. Since this is a stew and the chicken skin wasn’t going to stay crisp, I made an executive decision to eat some of the skin at its height of flavor and texture. This isn’t mentioned in the original recipe but it just seemed right.

DSC_9008

Once all of the chicken is browned and set aside, add the onions, garlic and spices to the pot.

DSC_9012

Next, add chicken pieces and cook, stirring constantly until contents are steaming. Reduce heat and add liquid. I used some chicken stock I had on hand but water is what the recipe called for. Cover and simmer until chicken is done.

DSC_9017

The curry is done once the bones are easily removed from the chicken meat. I let my curry cook on the stove for a few hours but it was done much sooner than that. Here’s what you’re looking for:

DSC_9039

If you can pull a bone out and it looks this clean, your curry is done!

DSC_9047

The truth is, this and many other curries I have enjoyed over the years just don’t look pretty. There’s no way to style a pot of chicken meat and bones to make it look really appetizing but never you worry, this dish is a winner! I served it over a batch of Yellow Quinoa (up next) and some pan seared greens. It had a really complex flavor and was a welcome change to the usual disappointment I feel when attempting homemade curries.

This is a great way to stretch out a whole chicken and the perfect use for those cinnamon sticks we all have hanging around our pantries, likely from some cider mulling recipe we never followed through with from the holidays. If you are following a Paleo lifestyle, this recipe packs a ton of flavor with none of the no-nos. Skip the quinoa and serve this on a bed of steamed greens! This would be a great crock-pot meal for my friends who don’t want to deal with the stove.

I’ve never ordered anything like this from a menu but am so happy I gave this one a try and can finally make a decent curry in my own home. It’s not Chicken Tikka Masala, or Massaman Curry but it’s fantastic and will definitely make another appearance on my dining table sooner rather than later.

By the way, if this is your cookbook I have, ahem, borrowed, please let me know and I’ll send you a new one!

Tagged , , , , , , , , , , , , , , , , ,

Roasted Broccoli with Garlic and… Anchovies!

Many would argue that broccoli is one of the most universally hated veggies. Some of our parents tried to conceal broccoli in a cloak of pasteurized process cheese product in the hopes that we would clear our plates and eat our veggies. Even our forty-first president, George H. W. Bush, famously despised broccoli. Along with other vegetables in the Brassica family (cauliflower, cabbage, Brussels sprouts, kale, turnips, etc.), broccoli gets a really bad rap.

My family’s unwavering dedication to Ranch dressing helped me to enjoy plenty of fresh vegetables growing up, including broccoli. To me, raw carrots, cucumbers, tomatoes, broccoli and cauliflower were nothing more than carriers for Ranch dressing.

There were times when I snubbed the vegetable, though, particularly when it was overcooked. Overcooked broccoli is absolutely inexcusable and is a surefire way to seal the deal on distaste for this vegetable. Perhaps this is why so many folks are anti-broccoli?  Too many servings of boiled, mushy masses of broccoli will do that to a person.

Even though broccoli doesn’t rank as my absolute favorite vegetable – the list is pretty extensive – I probably eat it more regularly than any other. It’s inexpensive, available year-round, quick to prepare and really healthy. I usually just steam broccoli on the stove top and serve it with butter or lemon. Nothing too creative but delicious, nonetheless.

This 100 First Tastes project has inspired me to find a new way to enjoy broccoli and I found a really interesting recipe in my Cook’s Illustrated Cookbook – Roasted Broccoli with Garlic and Anchovies. Now I know what you’re thinking but hear me out. Even more than broccoli, anchovies get a really bad rap. This is because they aren’t utilized properly and many people think they don’t like anchovies even though they do like Cesar salad and Worcestershire sauce. This recipe was the ultimate pairing of culinary underdogs so I just had to try it out. Here’s the modified recipe I used:

1 large head of broccoli

3 tablespoons extra-virgin olive oil

1/2 teaspoon salt

pepper to taste

2 tablespoons unsalted butter

4 garlic cloves, minced

2 anchovy fillets, minced

1 teaspoon thyme

I usually steam broccoli and was concerned that this preparation would take too long. Fortunately, this recipe is just as quick to prepare and is ready in about 10 minutes. I enjoyed it alongside the Bacon-Wrapped Meatloaf, also sourced from this cookbook. Here’s how:

Adjust your oven rack to the lowest position and heat the oven to 500 degrees. Wash up your broccoli and cut off the florets. Remove the outer peel from the stalk (it can be a little tough to chew through) and slice into 1/2 inch thick pieces.

DSC_8886

Place broccoli in a large bowl and toss with olive oil, salt and pepper until evenly coated.

DSC_8892

Transfer broccoli to a large rimmed baking sheet or baking pan. Roast broccoli until stalks are tender and florets are well browned. This should take about 10 minutes.

DSC_8900

While the broccoli is roasting, melt butter in a skillet over low heat. Add minced garlic and anchovies. If you are worried about any residual fishy flavor or the dish being too salty, you can rinse and pat dry the fillets before mincing. Cover and cook until anchovies have largely melted and garlic is softened. Remove from heat and stir in thyme. Toss roasted broccoli with mixture.

DSC_8919

Here’s what you’re looking for. Roasted up nicely, with some yummy charred bits in there too!

DSC_8925

This was a really delicious way to prepare broccoli. It was also a fantastic way to sneak in some anchovies! Aside from being tasty, did you know that anchovies are actually good for you? Here are some reasons why you should have anchovies in your life:

  1. They are full of those healthful essential fatty acids everyone is trying to get in their diet. 
  2. Since anchovies are a small and have a short lifespan, they contain fewer environmental toxins which are common to fish.
  3. Anchovies add umami – the elusive “fifth flavor”- to your dishes. (sweet, sour, salty, bitter, umami)
  4. They are full of Magnesium, Calcium, Iron, Phosphorus,  B12 and B6. A jar of anchovies is cheaper than a jar of these supplements! Food = Medicine.

There was nothing fishy about this dish and I will definitely be making this again. A little sweet, a little salty, perfectly balanced. Who knew the redheaded step children of the culinary world, with their powers combined, could make such a delicious dish? Cook’s Illustrated knew, that’s who.

Tagged , , , , , , ,